Nestable Table
This element is nestable, allowing for any Bricks elements to be added inside.
This element can be used inside query loops.
This element supports being used inside AJAX filtered content, either by Bricks’ native filter elements, WPGridbuilder, JetSmartFilters or PiotnetGrid
This element support being used inside both components & nested components.
- General
- Support FAQ
A nestable element for creating tables, static or using query loops. Has support for column stacking for creating vertical-style mobile tables & supports use with Bricks’ filter elements to create filterable/searchable table content with any elements inside of the table.
Using a Query Loop
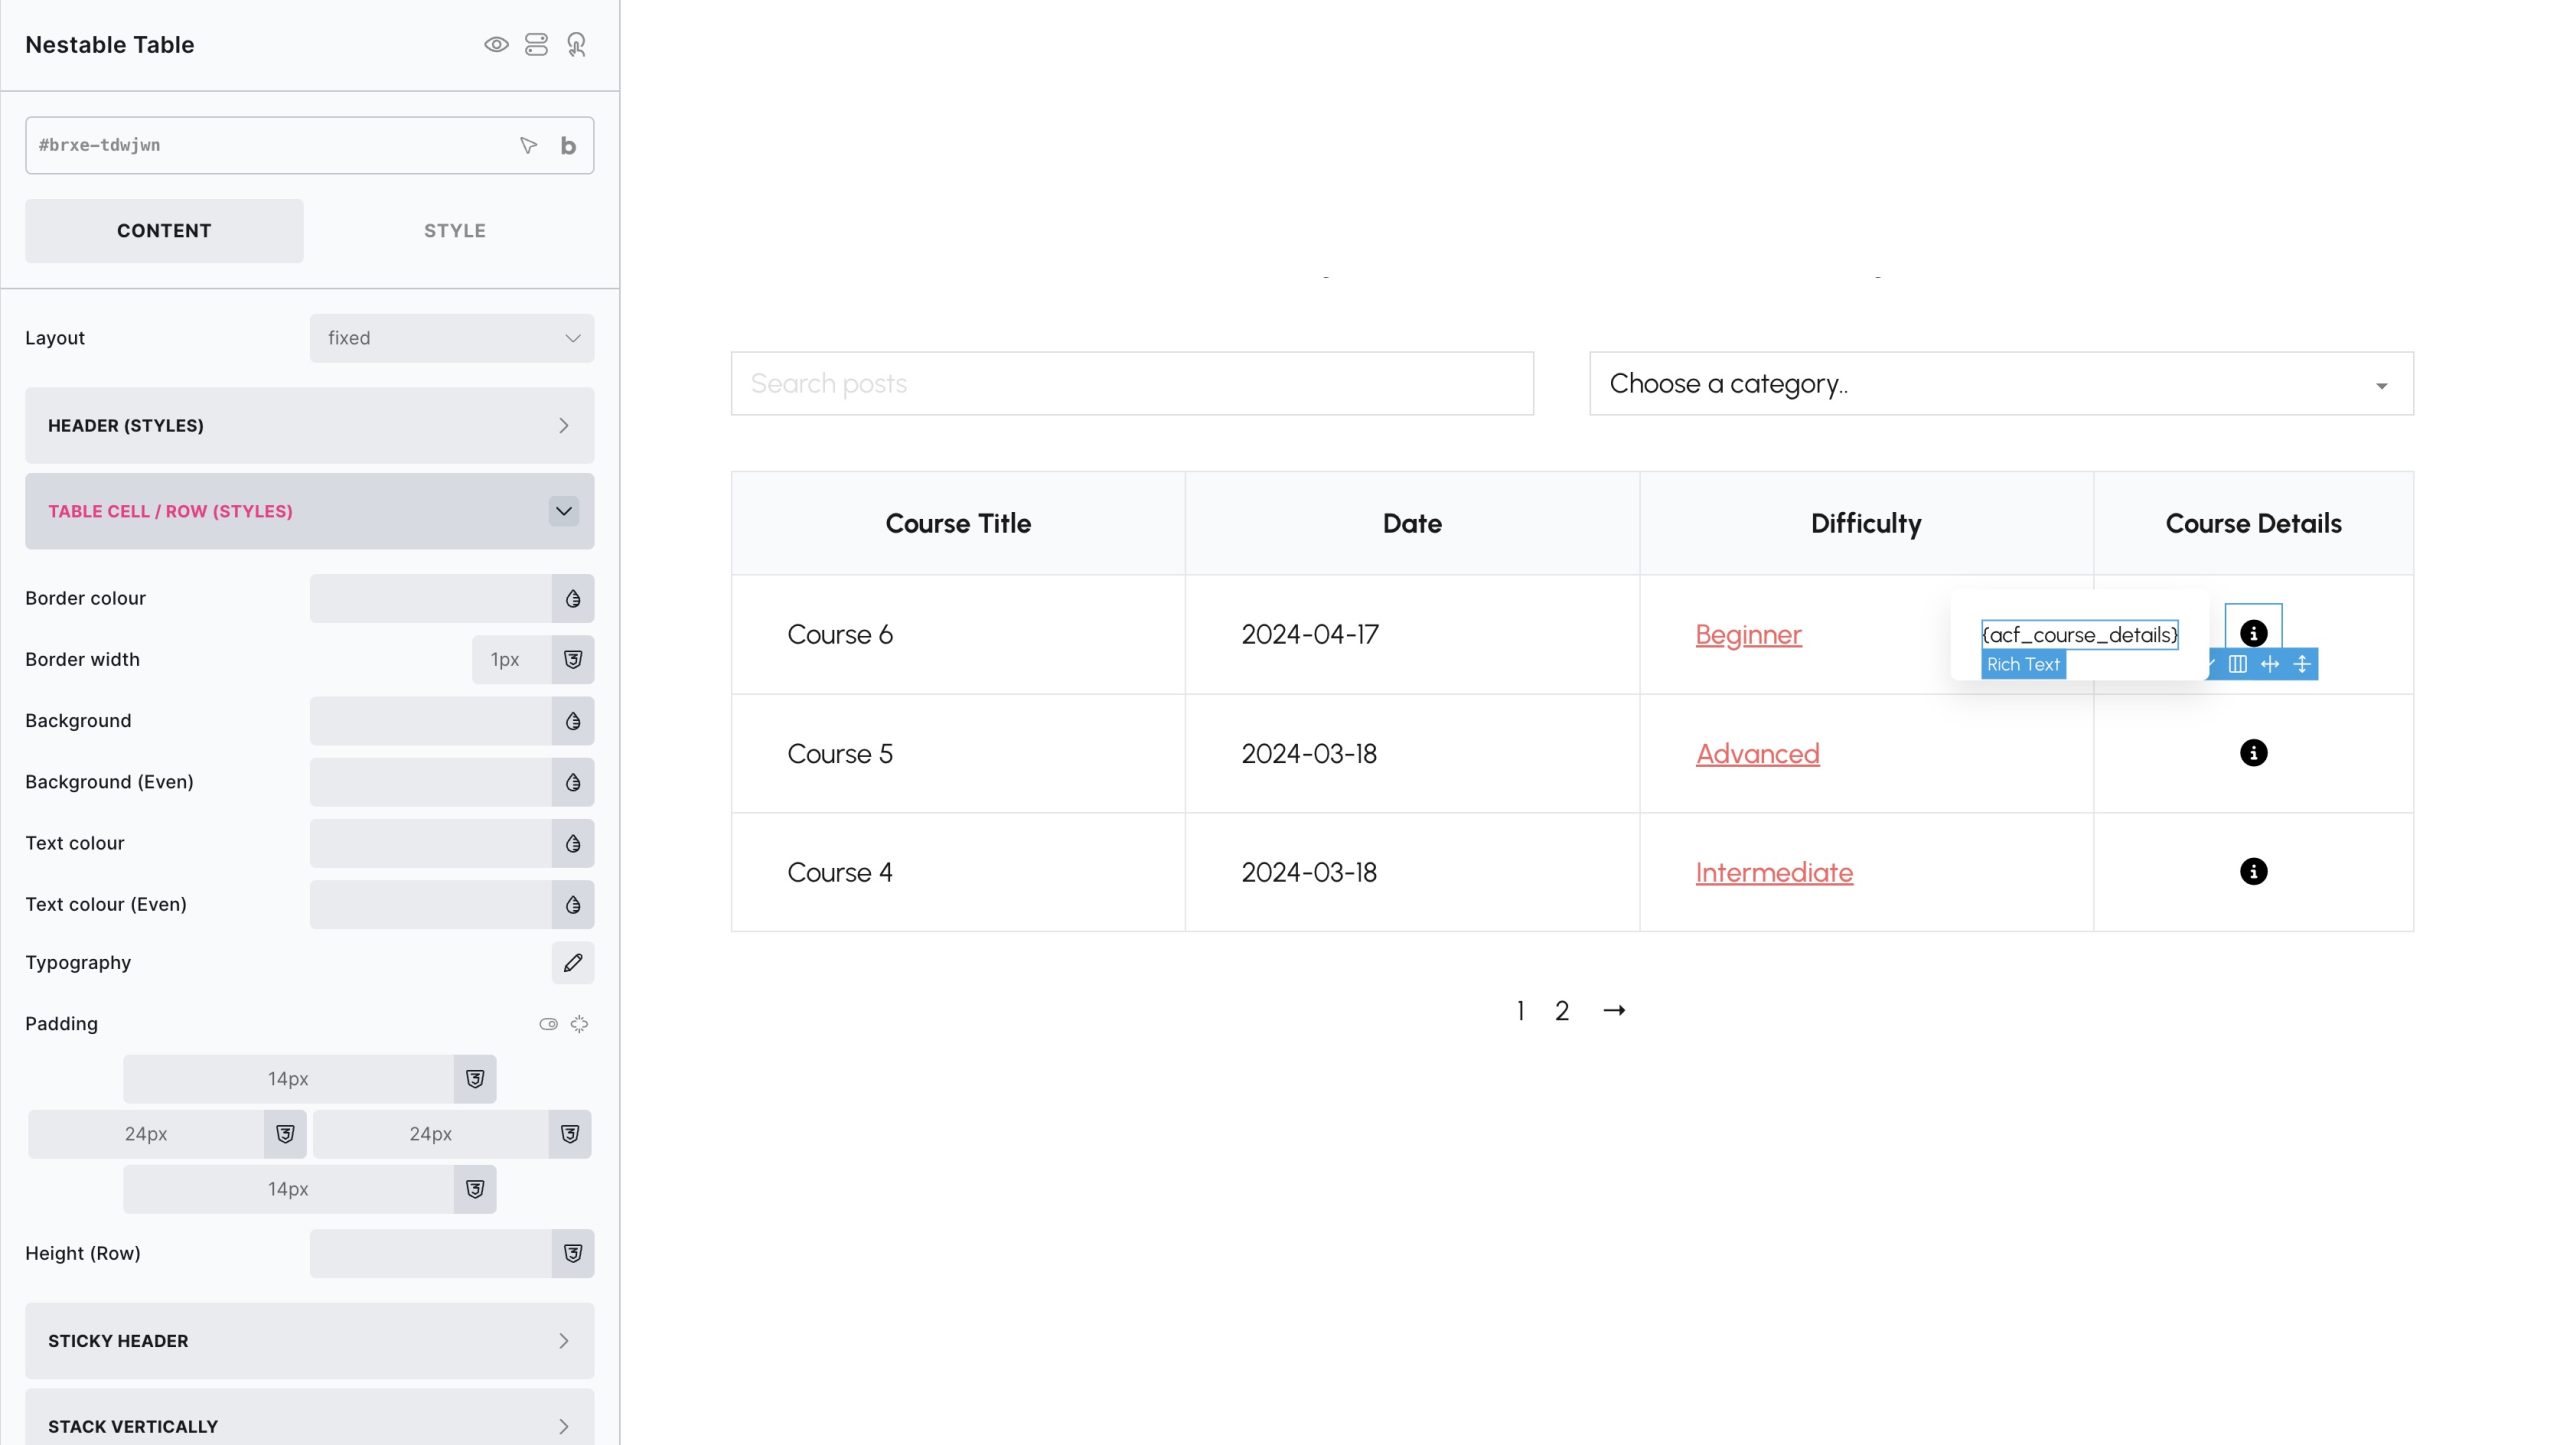
If wishing to populate the table rows dynamically with a query loop, you can do so by adding the query loop to the ‘row’ element in the structure panel. (as shown in the above image). This way each row is another item in the loop, and anything you place within a row using dynamic tags will pick up the data from that particular post in the loop.
Note that for ‘pricing tables’ or ‘feature comparison tables’ using this table element may not be the best approach, as these often need a completely different structure to a standard table. Often the requirement is to loop columns, and have the overall table width change as new products or pricing options are added, where as this table element it’s the table rows that you can loop.
Using Bricks Filters & Pagination
if using a query loop to populate the table rows, you can take advantage of Bricks’ AJAX filter elements to control the table output. By setting the ‘target query’ on the filter elements and pagination elements to the ‘row’ element in your table, you can make the table rows searchable and sortable. Control the number of rows initially visible by choosing the ‘posts per page’ in the query loop settings and then adding a pagination element set to ‘ajax’.
Static Table – Add rows/cells
If not using a query loop and just wish to build a table..
To add new cell columns – You’d need to add a new cells in two places, inside the table head for the ‘column titles’ and then inside the body.
To add new rows – Duplicate the ‘row’ element, which will contain all the cells for that row.
Table Layout
‘Table layout’ is a CSS property with two available options;
Fixed – The cells will be made equal width in the table by default.
Auto – The content of the cells will determine the width.
See the difference here – https://codepen.io/impressivewebs/full/MJgmpz
Nesting Elements
There’s no limitation on which elements you place inside of the table or how you style them. All BricksExtras elements & native Bricks elements can be used inside of the table that is being filtered/searched by Bricks’ AJAX filters or pagination.
If you’re trying to create flex/grid layouts inside of cells, add a new block element to control the layout rather than changing the actual table structure.
Sticky Header (1.4.7+)
Enable for the table header row to stick to the viewport as you scroll down the table.
By default, the ‘top’ value is set to 0 meaning the table header won’t stick until the very top of the viewport meets the top of the table. If using a sticky header, you may want to adjust this value to match your header height to prevent the table header being hidden.
Stack Vertically
Choose to have all the columns stack to create a more mobile-friendly vertical layout.
By default, the table will rearrange itself at the chosen breakpoint with the column labels on the left and the values of each cell on the right.
Cell content on new line – Useful if you have large labels that don’t fit on the left at smaller breakpoints. This will ensure the labels take up the full width with the cell content below it.
Stack columns vertically at breakpoint – Choose the breakpoint where the table with stack (and below)
Row gap – Separate each column data with a gap.
Column label widths – Depending on the labels, you may wish to some widths.
Note – any other styling is inherited from the other settings for the table. For eg if you wish to change the background of the table header when it is stacked, just go to that breakpoint and go back to the table header settings.