Interactions
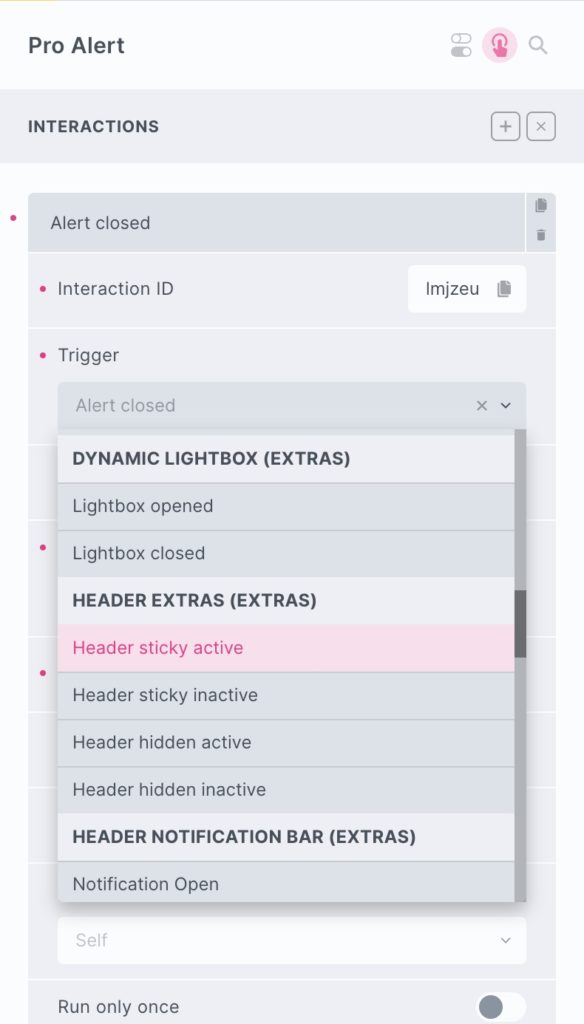
- Triggers
- Actions
From v1.4.1, many BricksExtras elements have their own triggers that can be reached from inside Bricks’ interaction settings. This essentially allows you to listen to BricksExtras elements for specific events (when the OffCanvas opens, the countdown ends, when the slide menu expands etc) and then add an action to trigger when that happens.
The purpose of adding these in is to allow for adding more custom functionality, to cover those edge cases where you may be trying to set something up that is outside of the available settings.
For the most common functionality in the element, generally, we’ll add it in as an option for simplicity. For example, moving the user focus when an OffCanvas opens, or syncing burger triggers, are commonly needed features that should be built-in. But for the edge cases, maybe you want to toggle the background color of your header only when slide menu opens – it’s not something we’re likely to add a specific setting for, it’s too unique (and adding everything in as a new options is only going to bloat a plugin), and so this opens up more possibilities of being able to create your own types of “when X happens, do Y” direct in the UI.
How to set up
- Always add the interaction to the element that you’re listening for an event to trigger (if listening for an OffCanvas opening, add the interaction to that OffCanvas regardless of what action you’re doing).
- Add a delay if needed (to wait X milliseconds after the trigger)
- Set up the action you wish to take place.
- If you only want it to happen once, enable ‘Run only once’.
Example
Let’s say we have a WSForms element on the page. When the user submits a form, we want the form to immediately disappear, and then 1 second later Bricks’ popup template to appear with some content to tell the user what to do next.
As it’s the WSForms element that we’re listening to (we’re waiting for the user to submit a form before doing anything), this is the element we want to add the interactions to.
These are two separate actions, we would set them up in the following way..
First action
- Add first interaction
- Choose “WSForms -> submission success” from the Trigger options.
- Delay = 0
- Action – Hide element
- Target – self

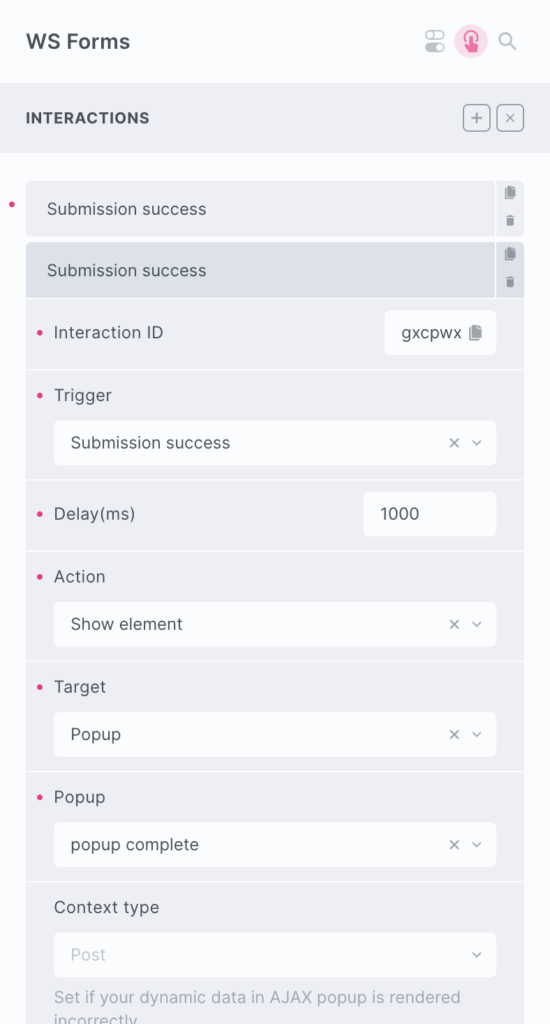
Action 2
- Add new interaction
- Choose “WSForms -> submission success” from the Trigger options.
- Delay = 1000(ms)
- Action – Show element
- Target – Popup
That’s it
Information on available triggers can be found in the ‘interactions tab’ found in each element’s documentation page. If the element isn’t activated, the trigger won’t be in the options.
From v1.4.1, many BricksExtras elements can be controlled through the interactions panel. Sometimes you may need something to happen based on an action, something not available from the settings. See the individual element docs for more details, under the ‘interactions’ tab and scroll to ‘Actions’ to find any actions available.
Slider Example
Let’s look at an example. The Pro Slider currently has four actions available..
bricksextras.slider.forward – Move slider forward x number of slides.
bricksextras.slider.backward– Move slider backward x number of slides.
bricksextras.slider.toslide – Move slider to specific slide index
bricksextras.slider.topage – Move slider to specific page index
These can be used with any trigger to control the slider. Clicking any elements, scrolling to an element, or any of the BricksExtras triggers.
Simply use the helper function like below..
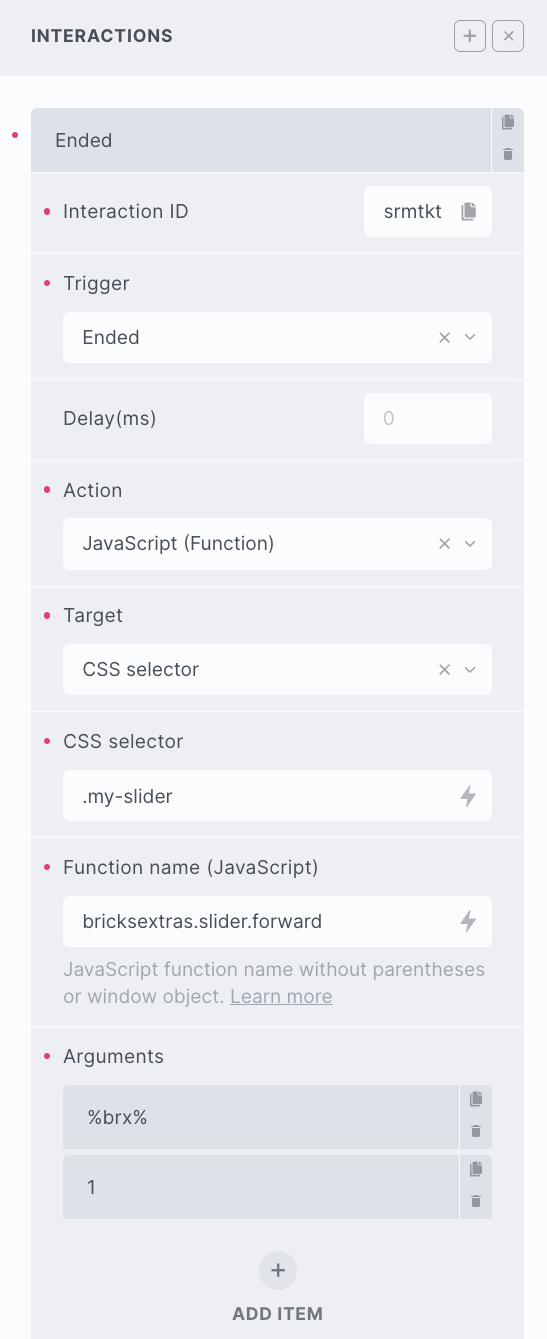
The arguments should always just be
- %brx% – This is the one automatically added by Bricks and should always be the first one.
- index – For the actions where you’re needing to set a specific index, like which slide to scroll to, this the second argument.
Accordion Example
Similarly, with the Pro Accordion, we can easily open the accordion at a chosen item using the same method..
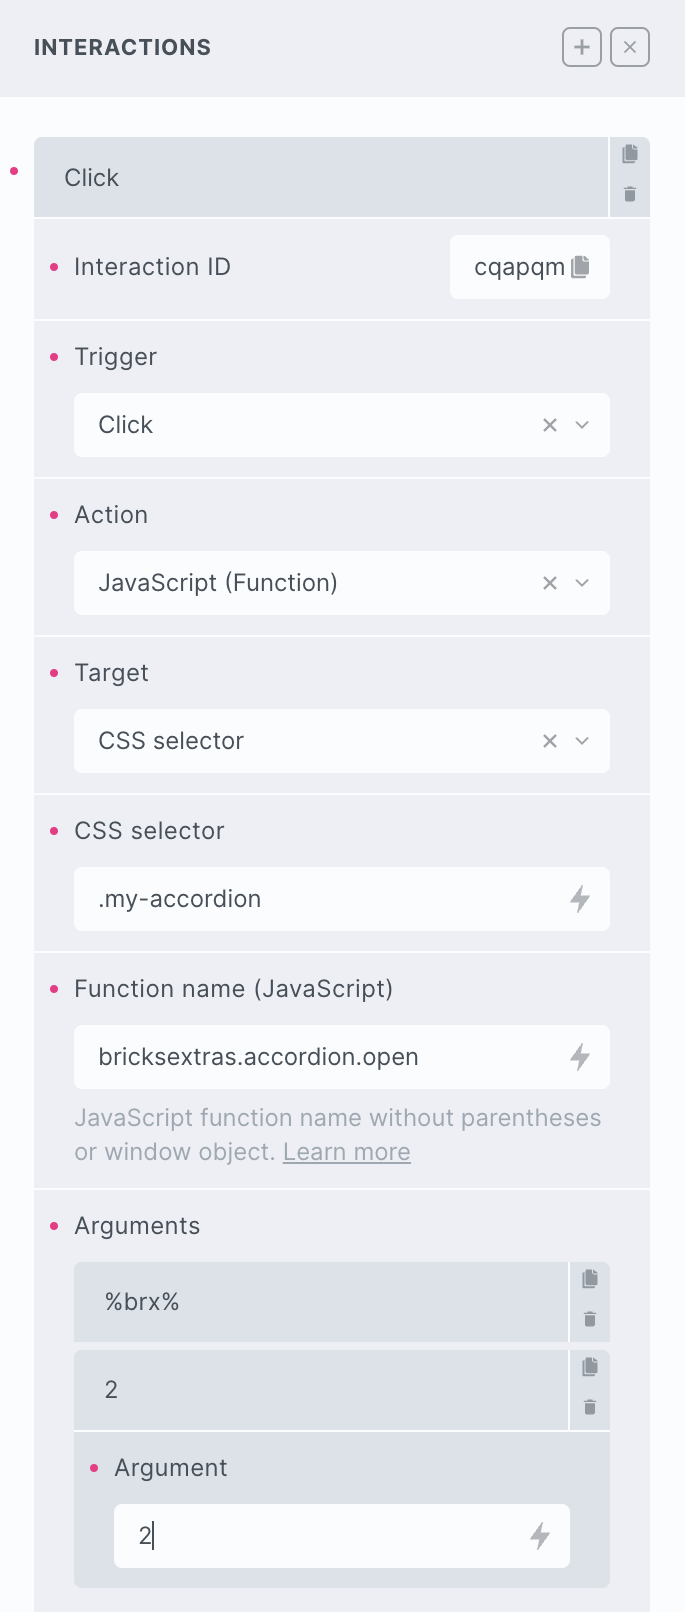
Here we’re opening the accordion item with the index of 2 when an element is clicked.